



Pop art eye nails are made by painting a cartoon-style eye in black gel polish over a coloured base, with thick lashes, a strong brow and a bright teardrop. In this tutorial Steffi paints the eye in Serious Black over two layers of peachy pink Tutti Frutti, fills the teardrop with Tropical Lagoon blue and finishes with a star and a few dots.
Bold, graphic and very on trend, it's a fun piece of line art nail art that's perfect for a mix and match manicure, and Steffi breaks every shape into small sections so it's easy to follow.
Below you'll find the products, each step with a link to that point in the video, and how to get thick and thin lines from the same brush.
At a Glance
- Design: a cartoon-style eye with thick lashes, a brow and a blue teardrop
- Artist: Steffi
- Technique: black line art in gel polish, painted with a detail brush
- Skill level: a good next step once you're comfortable with a detail brush
- Finish: glossy Top Coat
- Key products: Tutti Frutti, Serious Black, Tropical Lagoon, Ultra Fine Detail Brush, Top Coat
- Video length: 12:14
Why You'll Love These Pop Art Eye Nails
- Just two colours on a base. Black line work and one pop of blue.
- Broken into sections. Each shape is painted in small, manageable parts.
- Made for mix and match sets. It sits well beside other outlined designs.
- Forgiving line work. The lines are meant to be thick, so you can go back and fix them.
Products Used in This Video


How the Thick and Thin Lines Are Made
Every line in this design is painted with the same detail brush. The difference between a bold brow and a fine eyelid line comes from how much product is on the brush and how hard you press, not from swapping tools.
For thick lines, Steffi loads the brush with plenty of black and presses it down. For fine ones, she removes most of the product and uses very little pressure. Big shapes are broken into two curves joined together, which is easier than one long line and is the key to clean graphic nail art.
How to Create Pop Art Eye Nails
1. Paint the base
Apply two layers of Tutti Frutti all over the nail, curing each one. Watch this step at 0:00
2. Paint the top of the eye
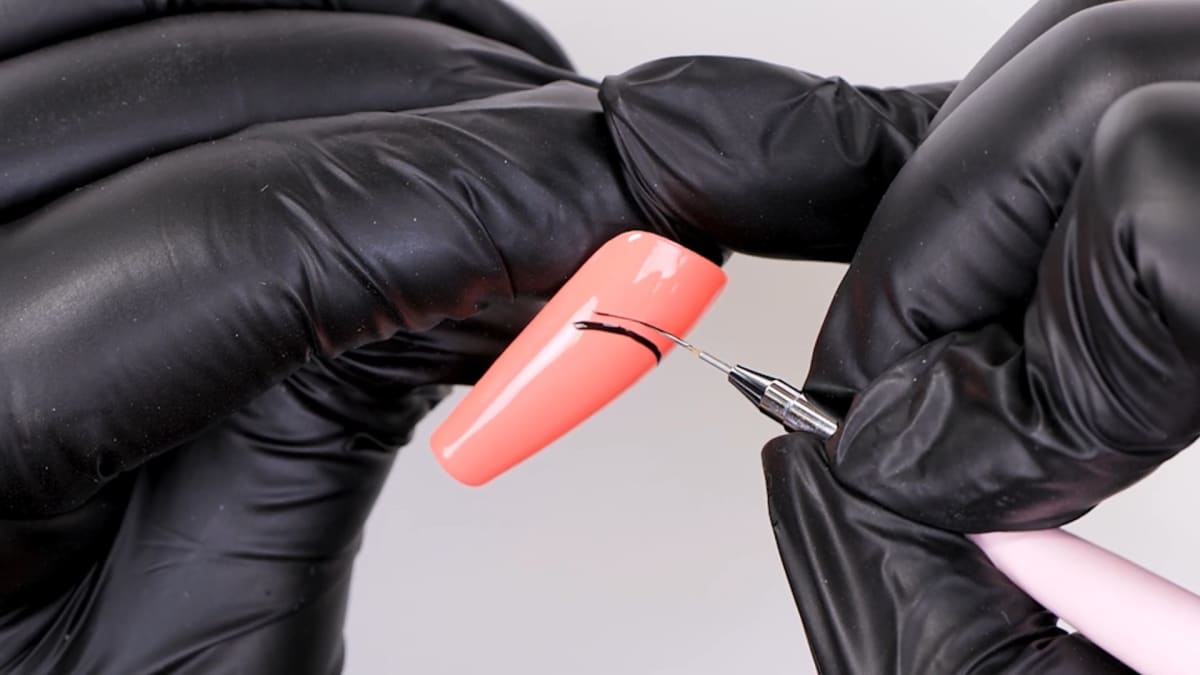
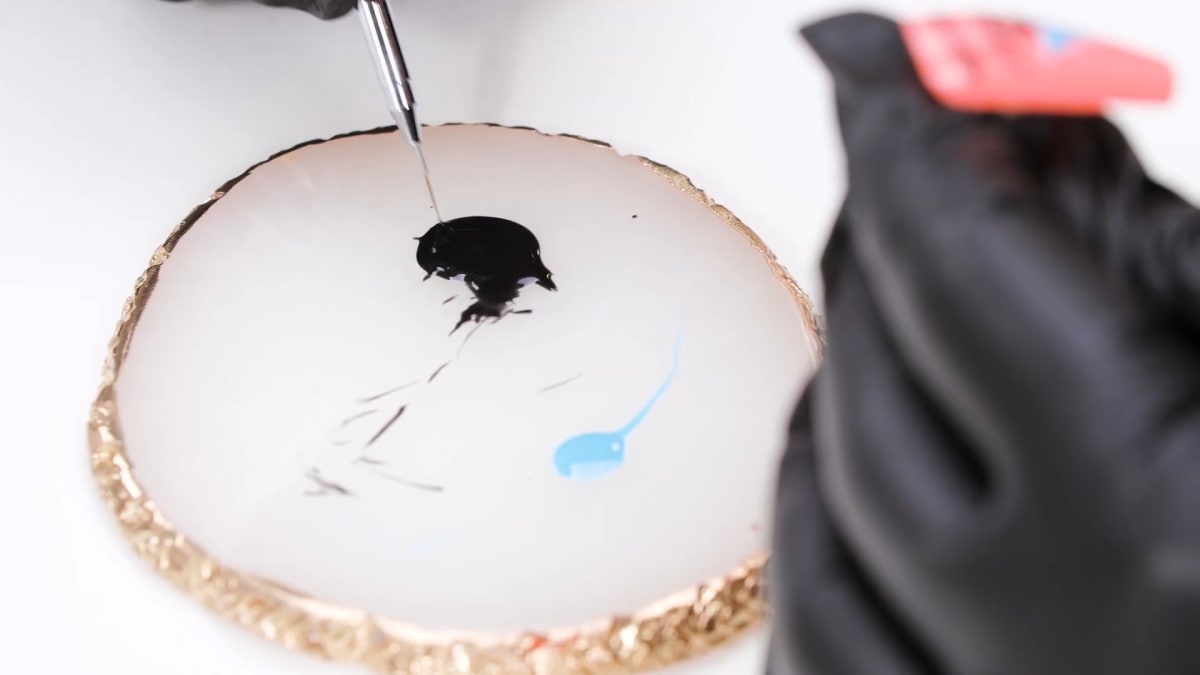
Put Serious Black on your palette and map out a curved line for the top of the eye, flicking it slightly at the end. You want this line to be quite thick, so don't stress if it looks uneven at first. Watch this step at 3:40
3. Add the eyelid
With little pressure and little product, paint a thin line just above for the eyelid. Do this before the eyelashes, otherwise you'll smear them. Watch this step at 4:10
4. Flick the lashes
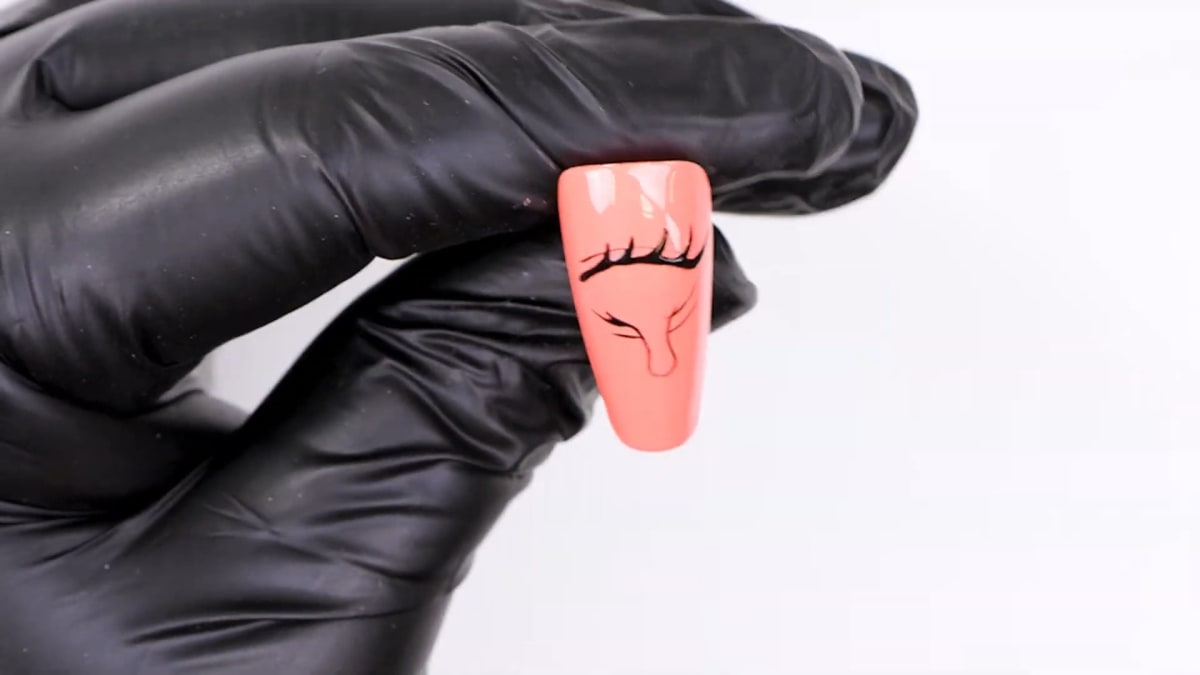
From the end of the line, flick upwards for each eyelash, thickening the line at the bottom and leaving it thin at the top. Watch this step at 4:40
5. Paint under the eye and the teardrop
Paint a short line under the eye and break it, then map out a teardrop coming from the middle of the eye: a little blob that runs down the nail. Add a couple of tiny lines underneath, like the lid at the top. Watch this step at 6:20
6. Paint the iris
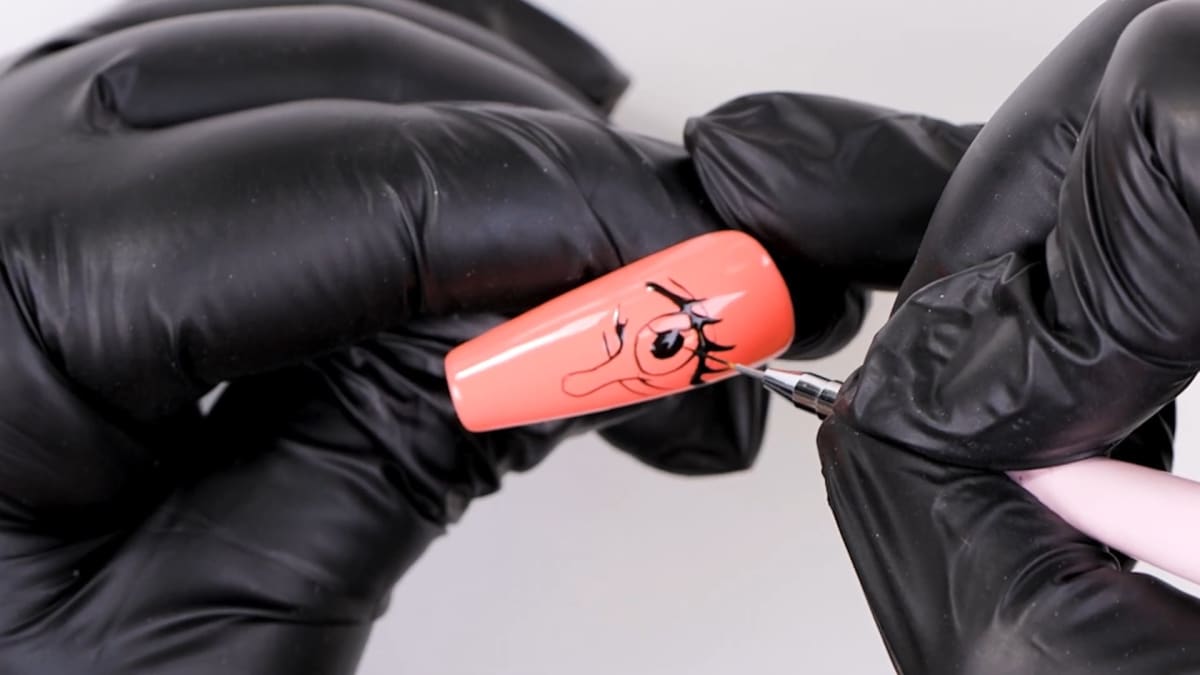
Paint two curved lines, one on each side, and join them with a small curved line. Fill in a round shape in the middle by picking up plenty of black and moving it around, and leave a small blob as a highlight for a cartoon look. Remove most of the product from your brush and flick fine lines outwards for detail. Watch this step at 7:30
7. Add the eyebrow and lower lashes
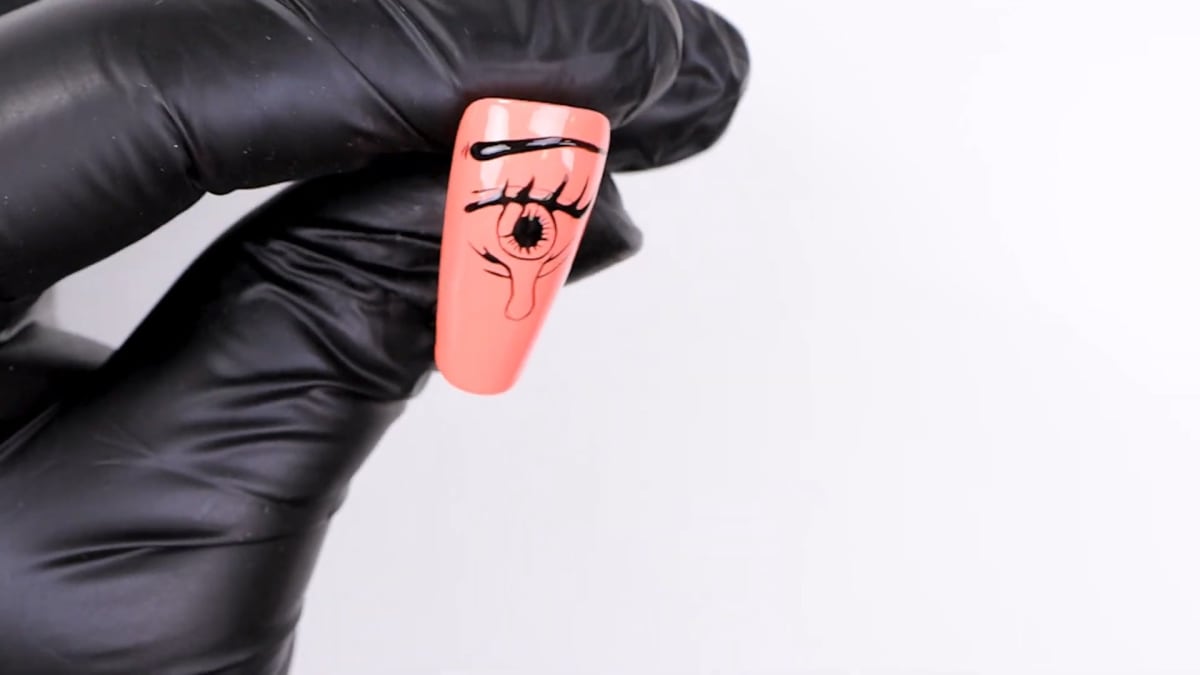
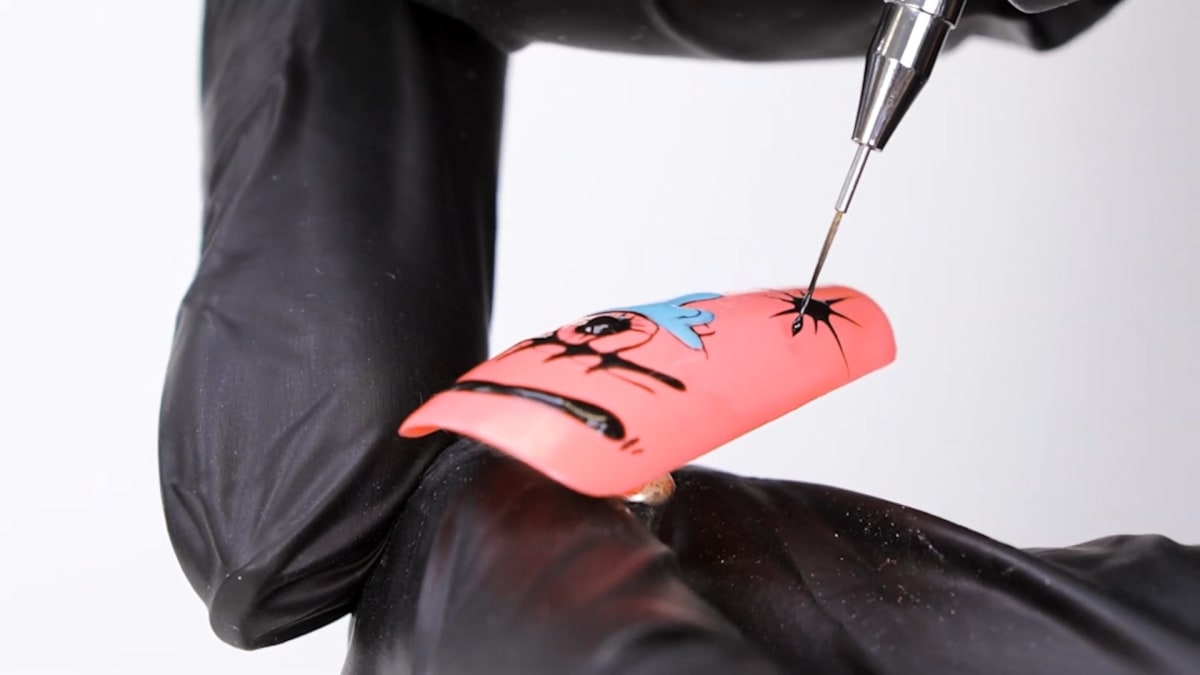
Load the brush with plenty of black, press it down and map out the eyebrow, pulling the product thinner towards the end. Add a few bottom lashes. Flash cure as you go to save your progress. Watch this step at 8:20
8. Fill the teardrop
Fill the teardrop with Tropical Lagoon, flash cure, then outline it in black. Watch this step at 9:10
9. Stars, dots and top coat
Add a star by pulling out some lines, plus a few dots to fill any empty space. Cure, then apply a generous coat of Top Coat. Watch this step at 10:50
Where to find each stage of the pop art eye nails video
| Stage | Time |
|---|---|
| Tutti Frutti base | 0:00 |
| Top line of the eye | 3:40 |
| Eyelid line | 4:10 |
| Eyelashes | 4:40 |
| Under-eye line and teardrop outline | 6:20 |
| Iris and highlight | 7:30 |
| Eyebrow and lower lashes | 8:20 |
| Filling the teardrop | 9:10 |
| Star, dots and Top Coat | 10:50 |
Pro Tips
- Lid before lashes. Painting the lid line first stops you smearing the lashes.
- Break shapes into sections. Two curves joined together are easier than one long line.
- More product, thicker line. Load the brush for bold lines and wipe it off for fine ones.
- Move the colour, don't draw a circle. Pick up plenty of black and manoeuvre it into a round shape.
Who Is This Design For?
This design is for anyone who loves graphic, illustrated nails and a mix and match manicure. It's a good next step for nail artists who are comfortable with a detail brush.
Ways to Make It Your Own
- Change the base colour.
- Fill the teardrop with a different shade.
- Leave out the teardrop for a simple eye.
- Pair it with other outlined designs across the set.
Aftercare
Apply cuticle oil daily, wear gloves for cleaning and washing up, and avoid using your nails as tools to keep your gel polish glossy.
Frequently Asked Questions
How do you make pop art eye nails?
Cure two layers of a base colour, then paint the top eye line, eyelid, lashes, iris, brow and a teardrop outline in black with a detail brush. Fill the teardrop with blue, add a star and dots, and seal with Top Coat.
What colours do I need?
Steffi uses Tutti Frutti for the base, Serious Black for the line work and Tropical Lagoon for the teardrop.
Why paint the eyelid before the lashes?
If you paint the lashes first, drawing the lid line over them will smear them.
How do I get thick and thin lines?
Use more product and pressure for thick lines, and remove most of the product from the brush for fine ones.
How do you paint the iris?
Paint two curved lines joined by a small curve, then pick up plenty of black and move it into a round shape, leaving a small blob as a highlight.
How do you paint the eyelashes?
Flick upwards from the end of the top line for each lash, keeping it thick at the bottom and thin at the top.
Do I need to cure between each part of the eye?
Steffi flash cures as she goes to save her progress, then cures before the Top Coat.
What goes with pop art eye nails in a set?
The design is made for mix and match manicures and sits well beside other outlined designs.
Give Pop Art Eye Nails a Try
Graphic, colourful and great fun to paint, pop art eye nails are a brilliant addition to any mixed set. Watch Steffi's full nail art tutorial above and pause to paint along.


