



To do French toes, you shape each nail to a straight edge, apply a base coat and two coats of a pigmented nude gel polish, then draw the white tip on in a gentle curve with a pointy tool instead of the bottle brush, and seal with top coat. In this tutorial Kirsty shows how to get a salon finish at home.
Her method makes a French pedicure much easier than painting the white tip straight on with a brush.
She works on her own feet, from shaping the nails through to the top coat, and explains why the toe version of a French looks a little different from the fingernail version. Below you'll find the products, each step and Kirsty's tips.
At a Glance
- Look: a classic French pedicure with a slim white tip
- Artist: Kirsty, on her own feet
- Technique: gel polish, with the white tip drawn on using a pointy tool
- Key products: Base Coat, Beauty Beneath, Snow White, Top Coat, Gel Residue Wipe-off Solution, Cuticle Oil
- Video length: about 16 minutes
Why You'll Love These French Toes
- A simple palette and pointy tool technique makes the white tip easy to control.
- The skinny free edge keeps toenails looking neat and elegant.
- Only a nude, a white and a few basics are needed.
- Toe separators are easy to improvise.
Products Used in This Video


How to Create French Toes
1. Shape the nails
Buff over the nails with a block and make sure each has a nice straight edge, slightly curved at the corners. Kirsty says a straight edge is key to a uniform French. Keep dusting off so you can see the shape clearly.
2. Counteract uneven nails slightly
If a nail grows off to one side, counteract it a little when shaping, but only a tiny bit, as taking off too much throws everything off on toes.
3. Clean and apply the base
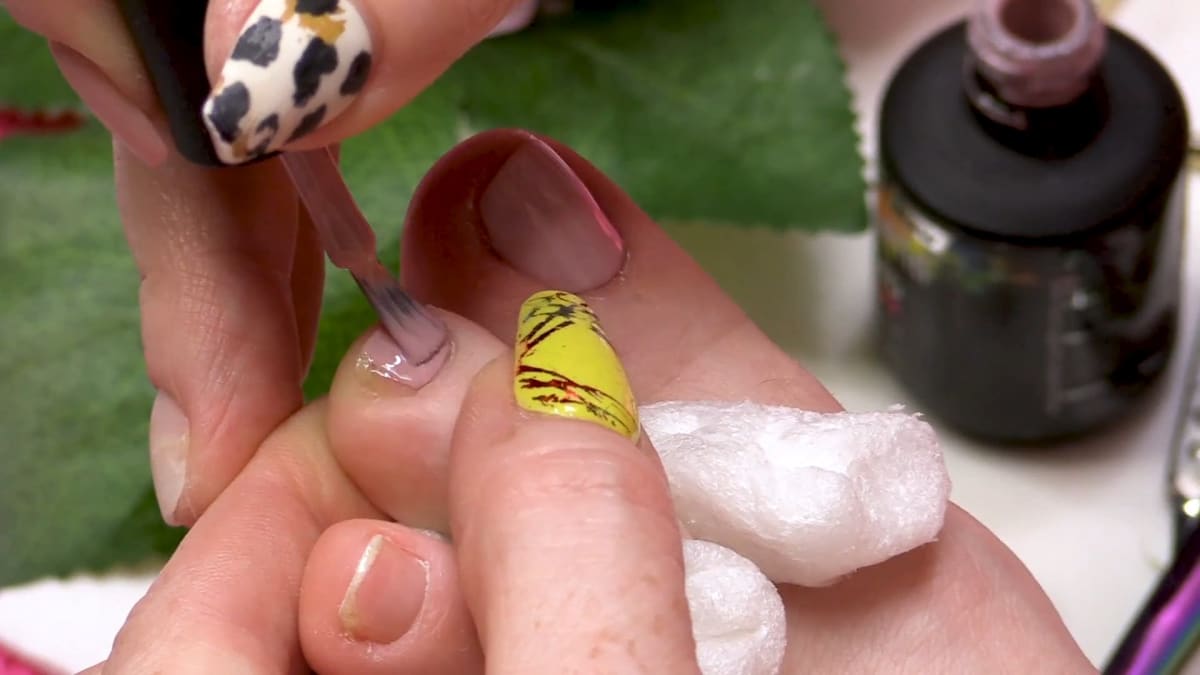
Wipe over with Gel Residue Wipe-off Solution, cleaning right down the sidewalls. Apply the Base Coat and do not skip it, as it gives a smoother application and helps the polish last longer. An orange wood stick dipped in a little solution tidies anything that touches the skin.
4. Separate the toes
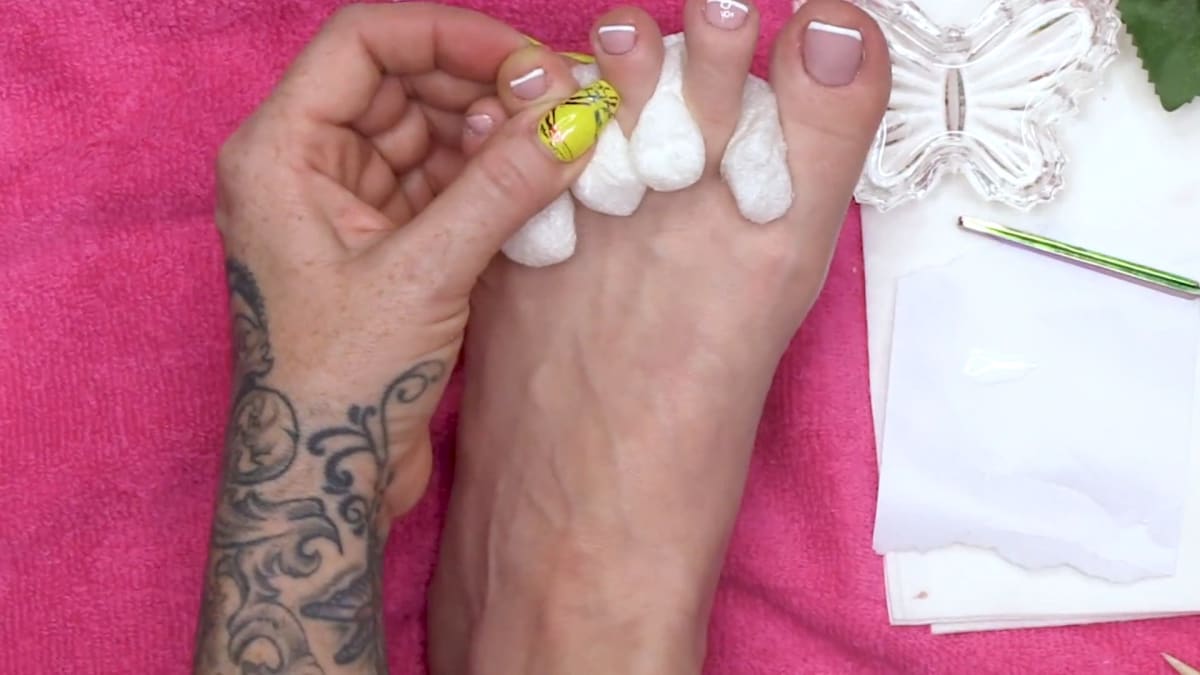
Use twisted kitchen towel or the packing material that arrives with your order as toe separators, so the polish stays clear of the neighbouring toes.
5. Apply the nude
Apply Beauty Beneath for strong coverage. Use a pointy tool to creep closer to the cuticle if needed. Cure the big toe first so it is not knocked, then do the other toes, followed by a second coat. Tap the brush on the side of the bottle to remove excess.
6. Draw the white tip
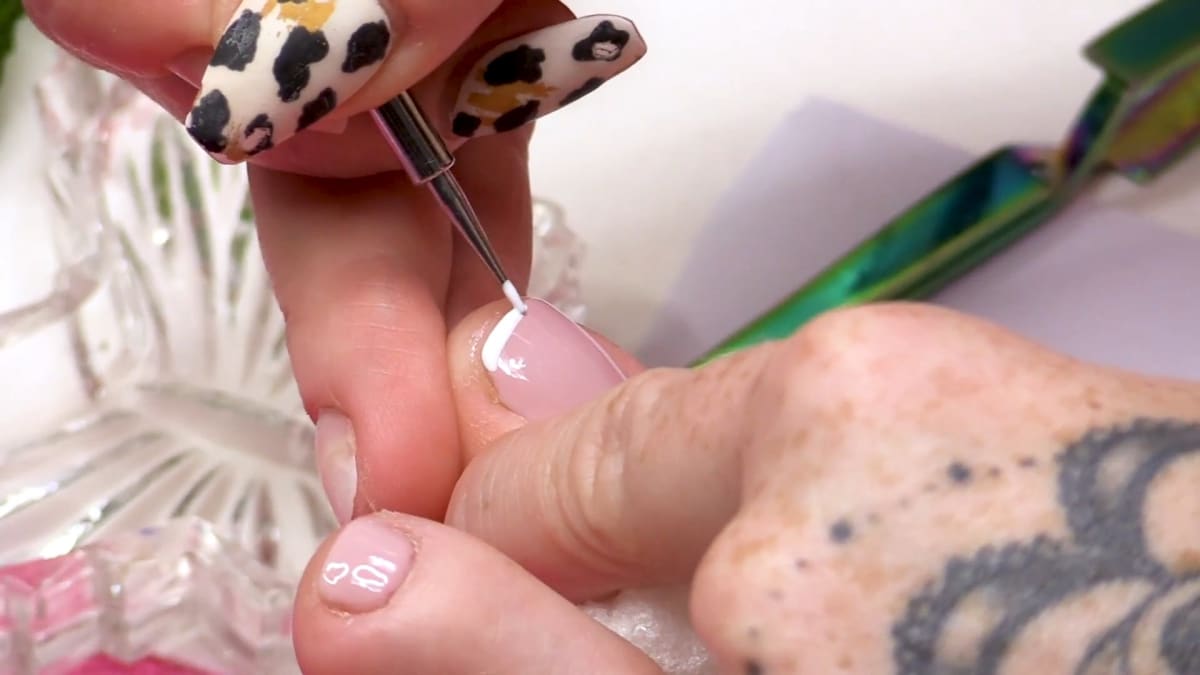
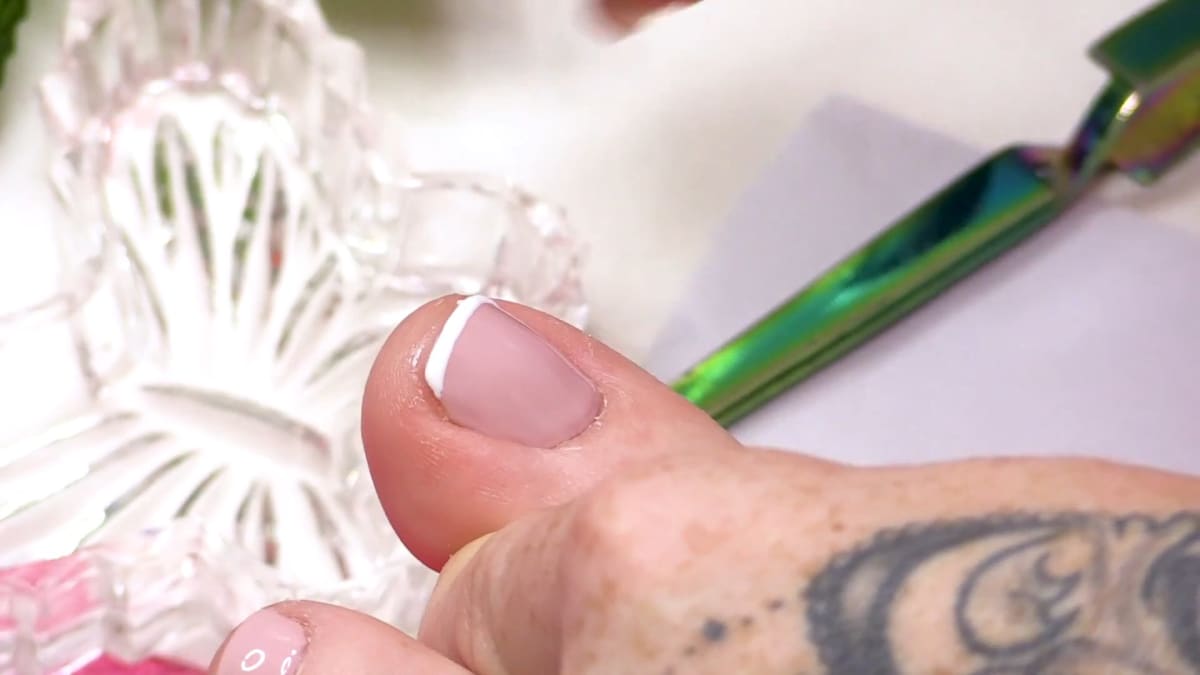
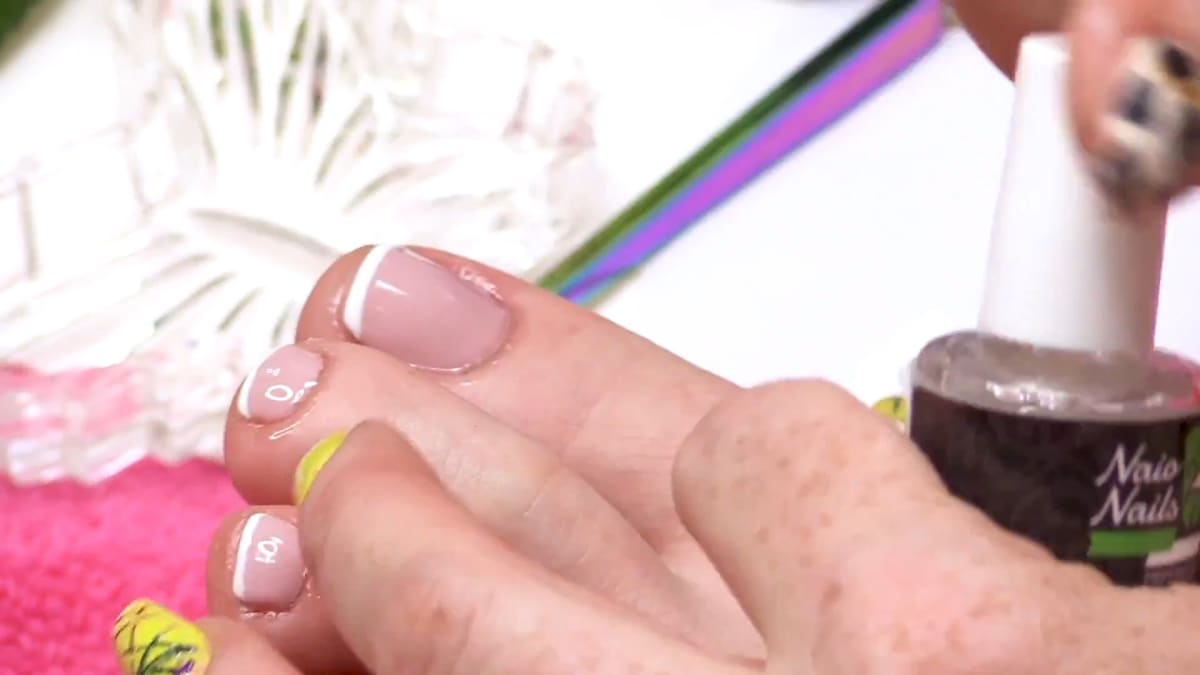
Put some Snow White on a palette and scoop it up with a dotting or pointy tool. Starting at one corner, draw the tip in a gentle curve, a little like drawing with a pen. You do not need the deep smile line used on fingernails, and you should not bring the white far down the sides, or the nail will look wider. Cure. Snow White is so pigmented that a second layer is not needed.
7. Tidy and seal
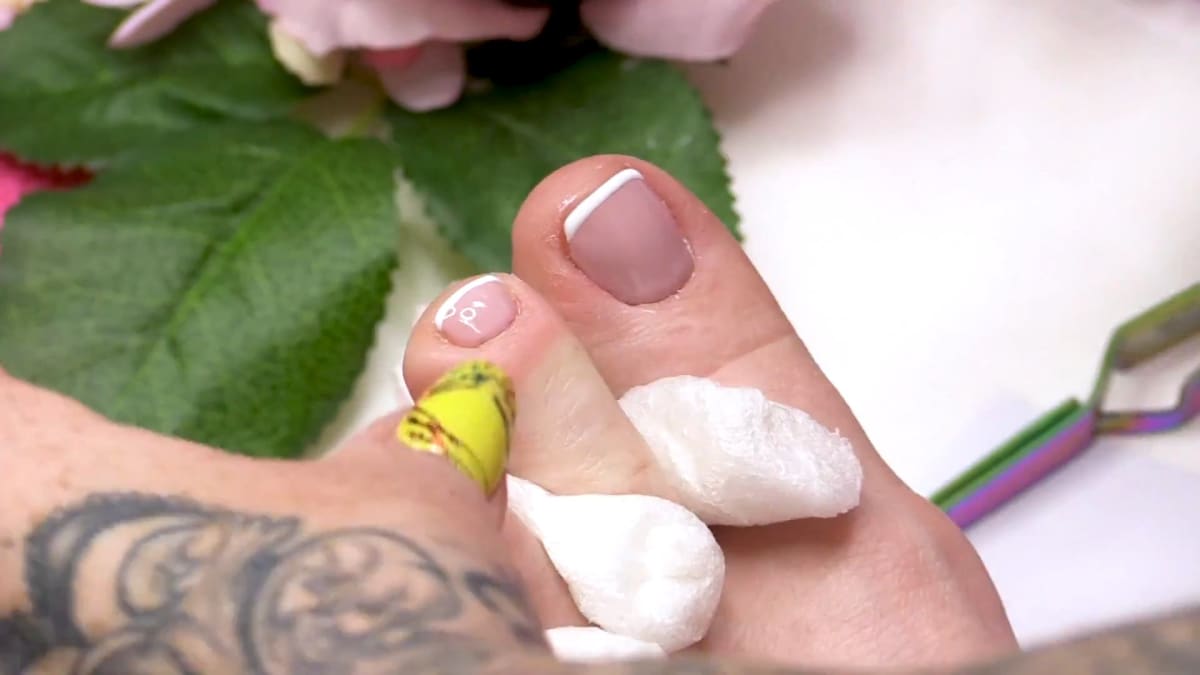
If the white comes too low, sweep it out with a brush that has a little Gel Residue Wipe-off Solution on it, blotted first. Finish with Top Coat and a little Cuticle Oil.
Pro Tips
- Never skip the base for a smooth finish.
- You only need a little white, as it is easier to add than take away.
- Cure the big toe first so you do not knock it while working on the rest.
- Keep the white away from the sidewalls so the nails look slim.
Common Mistakes
- Taking off too much nail when correcting an uneven shape. On toes this throws the whole set off, so only correct a tiny bit.
Who Is This Design For?
French toes suit anyone who likes a clean, classic pedicure. The palette technique makes it a good option if you worry about the small surface area, and it is an easy gel polish pedicure to do yourself.
Ways to Make It Your Own
- Swap the white for a pastel or a bold colour.
- Choose a sheerer nude for a more natural look.
- Try the same method on your fingernails with a deeper smile line.
Aftercare
Massage Cuticle Oil into the nails and surrounding skin each day to keep them hydrated.
Frequently Asked Questions
How do you do French toes?
Shape the nails to a straight edge, apply base coat and two coats of a pigmented nude, draw the white tip in a gentle curve with a pointy tool, cure, then top coat.
Do I need a deep smile line on toes?
No. Kirsty explains a deep smile line looks odd on toes, so just curve the corners slightly.
How do I stop the white looking patchy?
Use a highly pigmented white such as Snow White, which Kirsty says needs only one layer.
What can I use to separate my toes?
Twisted kitchen towel or the packing material from your gel polish delivery both work.
What if the white tip comes too low?
Sweep it out with a blotted brush that has a little Gel Residue Wipe-off Solution on it before curing.
Why cure the big toe first?
So it is not knocked while you work on the other toes.
Why keep the white away from the sides?
Bringing the white far down the sides makes the nail look wider.
Give French Toes a Try
Watch the video above and follow along for a simple, neat French pedicure at home.


