



To make snake skin and marble nails, you rub chrome pigment over a black section, create a marble on a white section with permanent markers and Gel Residue Wipe Off Solution, then add a bubble mix to wet top coat before curing for the snake skin texture. In this tutorial Kirsty uses the two techniques together to make bubble nails.
She mixes the techniques across a sculpted set, so each nail is a little different.
The design uses black, white and Copper Chrome Pigment, with bling added at the end. Below you'll find the products, each step with its place in the video, and Kirsty's tips.
At a Glance
- Design: copper chrome snake skin and black and white marble, mixed across the set
- Artist: Kirsty
- Technique: bubble technique, chrome pigment and permanent marker marble on sculpted nails
- Key products: Serious Black, Copper Chrome Pigment Powder, Snow White, Urban Graffiti Top Coat
- Video length: about 22 and a half minutes
Why You'll Love These Snake Skin and Marble Nails
- Two techniques in one set, mixed across different nails
- A bronzy copper chrome that looks great over black
- A marble effect made with permanent markers
- A bubble mix made from simple ingredients
Products Used in This Video


How to Create Snake Skin and Marble Nails
1. Sculpt the nail and apply black
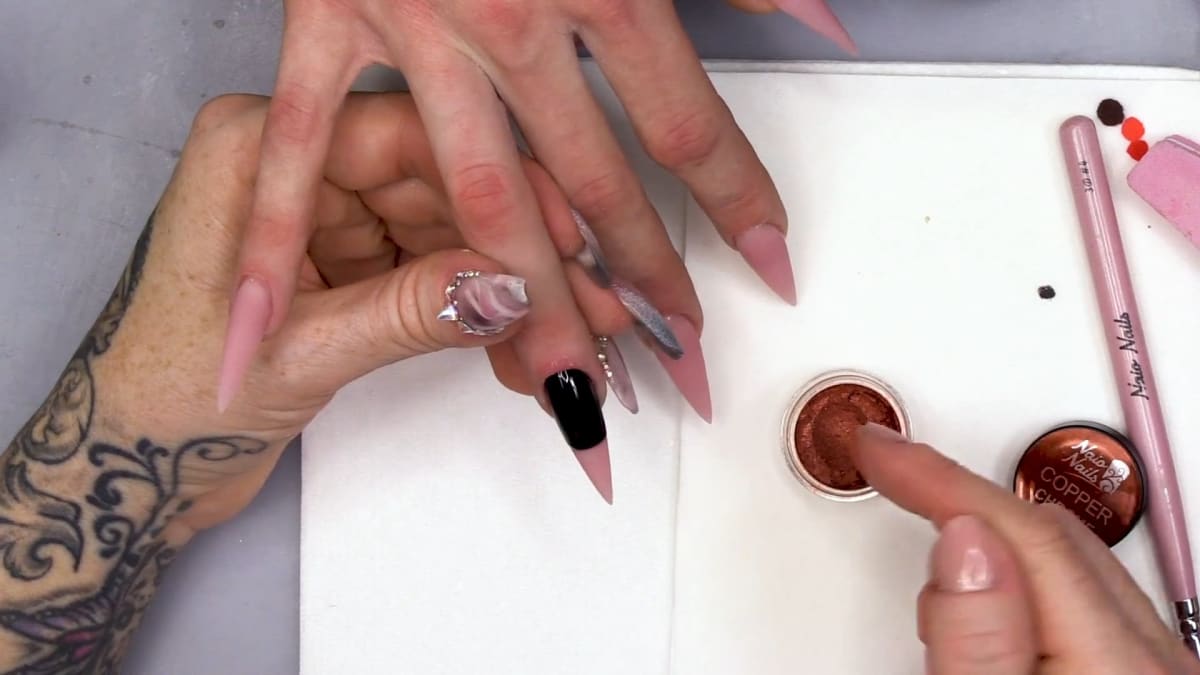
Sculpt the nail first. On the ring finger, apply Serious Black to the top section, top coat and cure. Watch this step at 3:20
2. Add the chrome
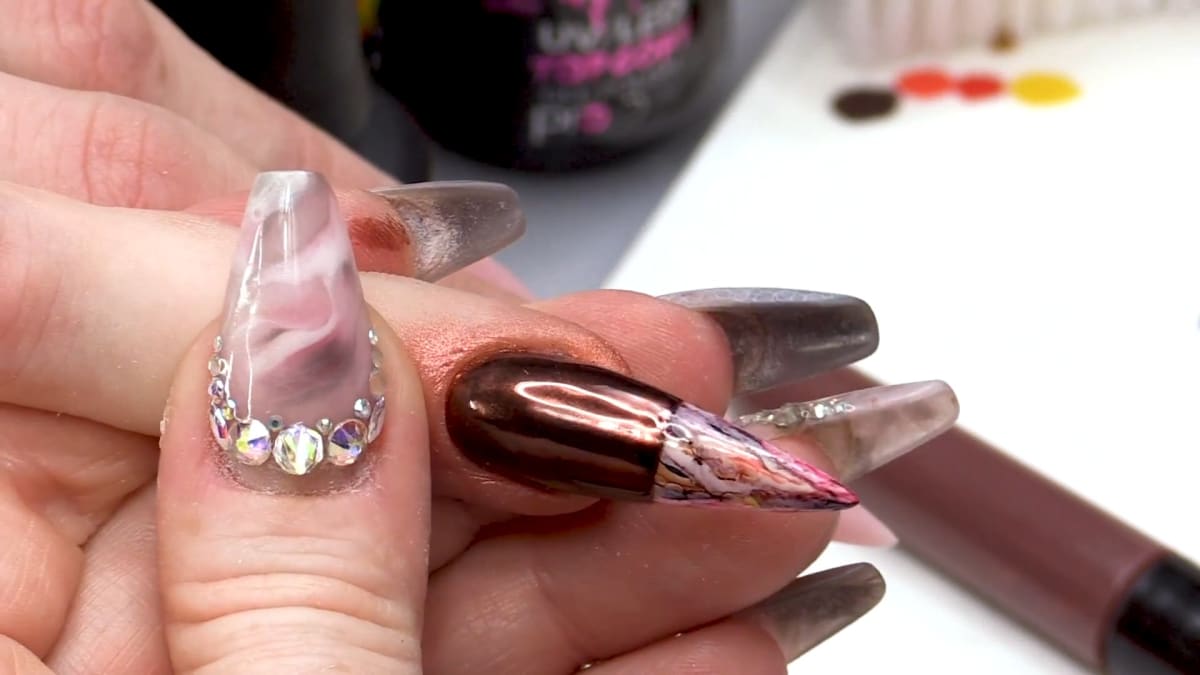
Rub Copper Chrome Pigment over the black with your finger for a bronzy copper colour, wipe off the excess with a dry lint free pad, then top coat again to seal it in. Make sure you get tight to the cuticle and completely top coat the edge. Watch this step at 6:40
3. Make the marble
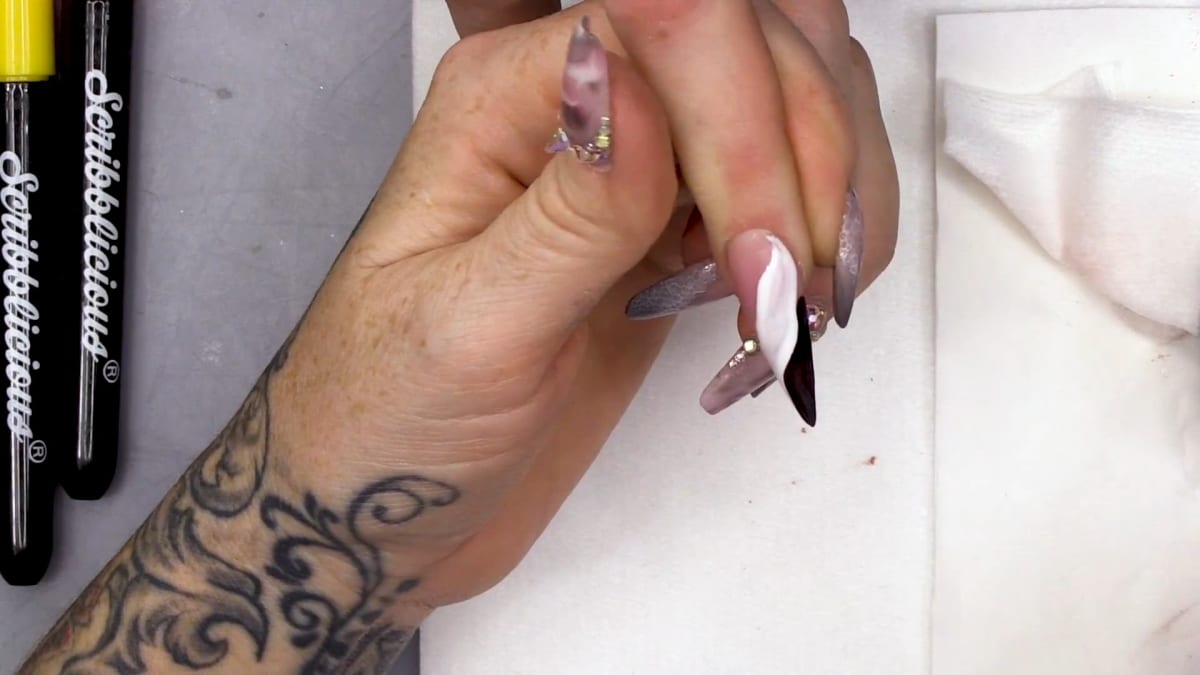
Do the bottom half in white, then use permanent markers and Gel Residue Wipe Off Solution to create the marble effect. Do the white first, because black will cover white but white will not cover black. Watch this step at 10:00
4. Add the bubbles
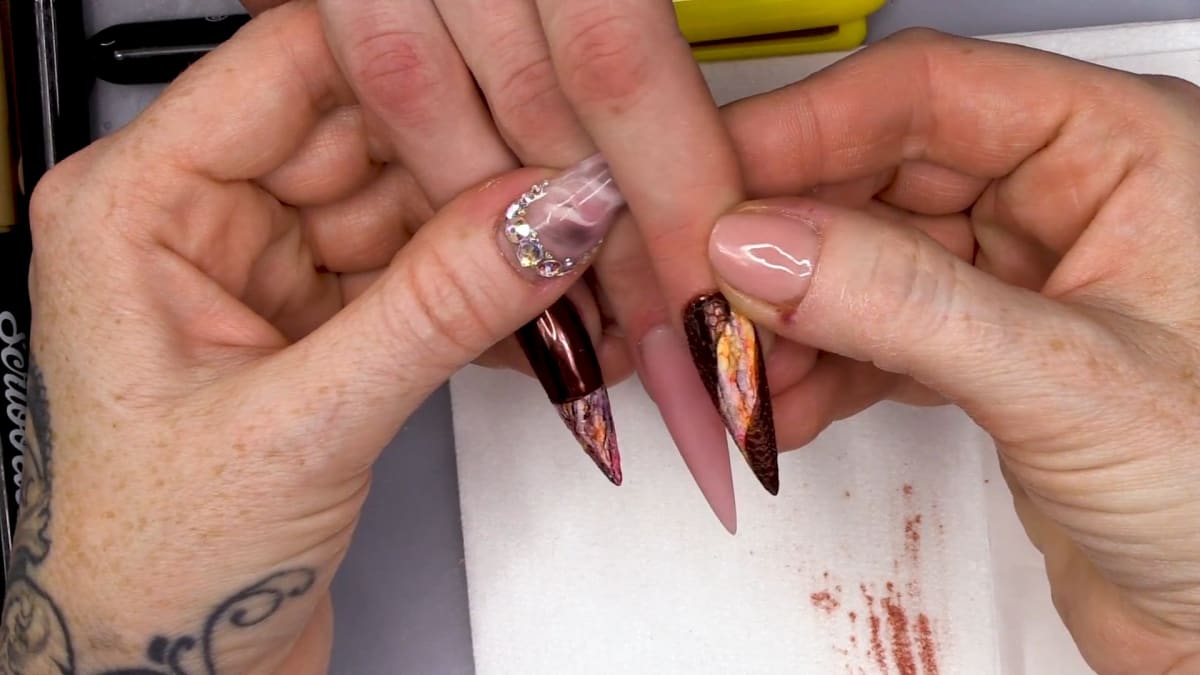
Apply top coat and, before curing, add the bubble mix of Gel Residue Wipe Off Solution, water and dish soap. Cure, then wipe the whole nail with Gel Residue Wipe Off Solution. Watch this step at 13:20
5. Mix the techniques across the nails
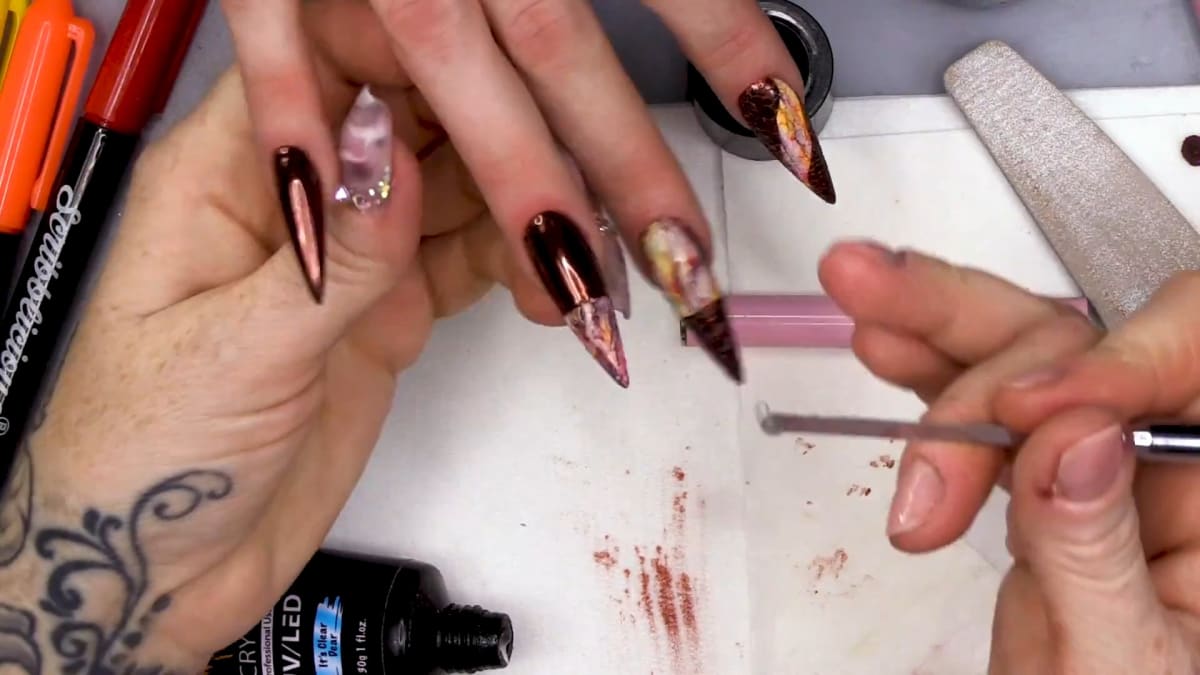
Pointer finger: marble swoosh in the middle with chrome around the rest, and bubbles over the whole nail. Middle finger: marble on the top and chrome on the bottom, with bubbles on the marble section. Pinky: full chrome. Thumb: full marble. Watch this step at 18:20
6. Finish
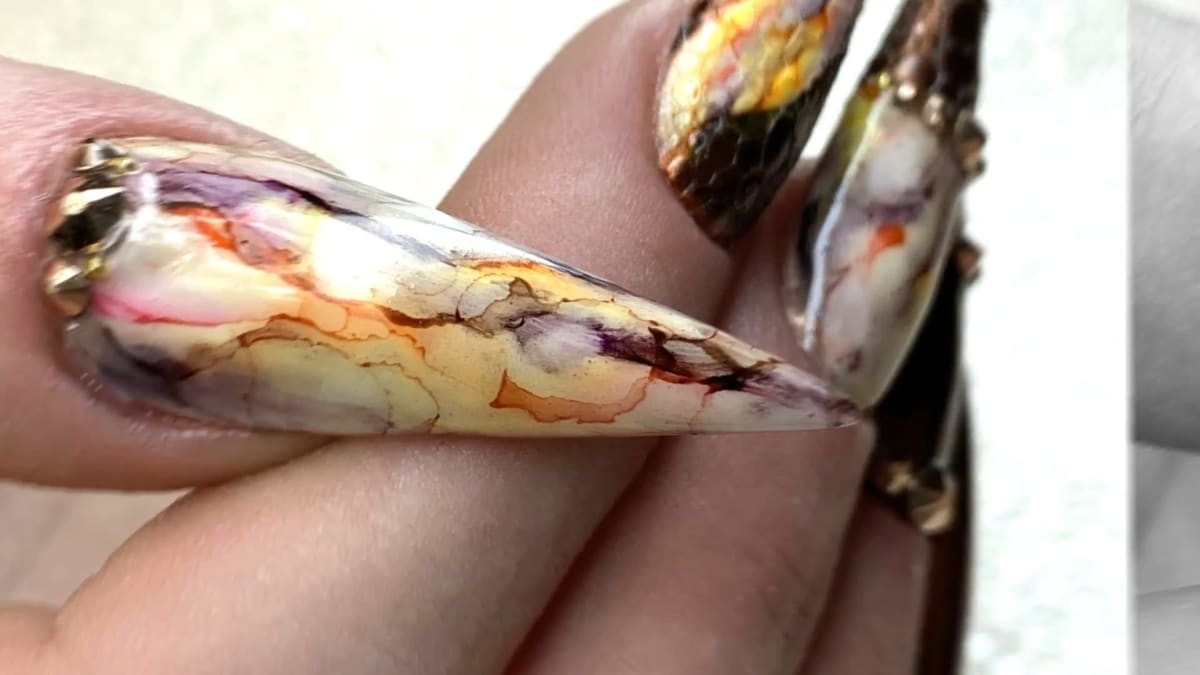
Buff lightly for a smoother, still textured finish, add bling, top coat and finish with cuticle oil. Watch this step at 21:40
Where to find each stage of the Snake Skin and Marble Nails video
| Stage | Time |
|---|---|
| Sculpting and the black section | 3:20 |
| Copper chrome | 6:40 |
| Permanent marker marble | 10:00 |
| Bubble mix | 13:20 |
| Mixing the techniques across the nails | 18:20 |
| Buffing, bling and top coat | 21:40 |
Pro Tips
- Do the white before the black, as black covers white but not the other way round.
- Apply chrome with your fingers for a stronger finish.
- A light buff matts off the spiky bits and leaves a smoother texture.
- Top coat tight to the cuticle and over the edges.
Who Is This Design For?
This design is for anyone who wants a textured, edgy look, and nail techs who want to practise bubble and marble techniques. It also shows a quick way into marble nail art without blending gel.
Ways to Make It Your Own
- Use a different chrome colour
- Change which nails get bubbles and which get marble
- Add more or fewer stones
Aftercare
Keep cuticles moisturised with oil daily and avoid using nails as tools.
Frequently Asked Questions
How do you make snake skin and marble nails?
Rub Copper Chrome Pigment over a top coated black section, marble a white section with permanent markers and Gel Residue Wipe Off Solution, then add the bubble mix to wet top coat before curing and wipe the nail afterwards.
What is in the bubble mix?
Gel Residue Wipe Off Solution, water and dish soap.
How is the marble made?
With permanent markers and Gel Residue Wipe Off Solution over a white base.
Why do the white first?
Black will cover the white, but the white will not cover black.
How is the chrome applied?
Rubbed over the black with a finger, with the excess wiped off using a dry lint free pad, then sealed with top coat.
Does every nail have both effects?
No. The pinky is full chrome and the thumb is full marble, while the other nails mix the two.
Why buff at the end?
A light buff matts off the spiky bits and leaves a smoother, still textured finish.
Give Snake Skin and Marble Nails a Try
Watch the nail art tutorial above, then give the techniques a go and share your results.


